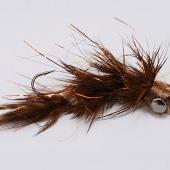
Rainy's Grand Hopper
The art of fly-tying has evolved in a similar fashion to that of the painted canvas. Paints and mediums change as represented by the newest digital art endeavors. A similar evolution happened within fly-tying, and Rainy’s Grand Hopper is this summer’s pixel art.
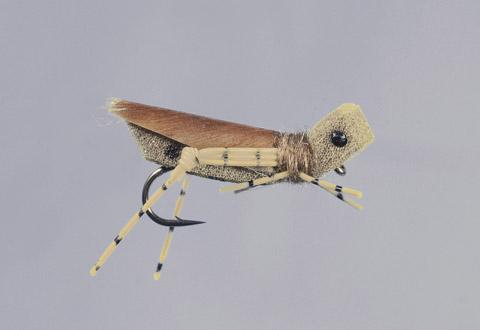
Tied of buoyant, easily trimmed 1/4-inch sheet foam, the Grand Hopper is a simple representation of Montana’s sought-after “Hopper Hatch.” In late July and August, when warm summer winds blow hard on the dry ranch grasses, the grasshoppers are whisked into the cool river, where large ravenous trout lurk under shady cut banks. Fishing this occurrence gives the angler the “hopper-tunity” to experience some of the most explosive strikes near the edges of the river.
Instructions
1. To tie the Grand, begin by using a Dai-Riki 270 or Tiemco 200R hook, in a #12 to #4. I think the most popular sizes are #6 to #8.
2. Wrap the shank of the hook in tan 6/0 Uni-thread, stopping approximately 1/4 the length of the shank from the eye.
3. From your sheet of foam, cut a strip that is 1/4-inch high and about 1/5 longer than the shank of the hook.
4. Cut a wedge shape in the rear of the foam, and with a razor or sharp scissors, make an incision down 3/4 of the middle of the underside of the foam.
5. Apply a good coat of Zap-A-Gap to the thread wrapped on the hook shank, and slip the incision in the foam body over the shank. Give the body a slight squeeze, and it will now be bonded to the shank.
6. Now pull the thread over the foam, and the head portion should rise slightly, forming a buoyant and distinct head and body. You will tie in each additional element of the fly at this same junction.
7. Trip a clump of 10-15 strands of Pearl Krystal Flash, and tie it in so it extends slightly past the wedge-shaped rear of the fly.
8. Now cut a wing out of any number of materials. I like to use Thin Skin, a plastic sheet that’s easy to trim, very durable, and comes in a multitude of patterns. I prefer the Mottled Oak Golden Stone, but you choose your favorite. Tie this wing in so it drapes back over the Krystal Flash.
9. For the legs, use any number of rubber legs on the market. The main objective is to have a thick thigh portion (three or four strands) that comes off the thorax, a knee, and then one strand that will wiggle and protrude into the water. To achieve this, I take a long group of legs and tie an overhand knot in the middle. This will become the knee.
10. Tie the legs to the fly, leaving some overlapping forward.
11. Trim the section behind the knee so that only one strand is pointing downward, and trim the excess near the head so two short stubs point out and forward.
12. Using a light tan or golden-stone-colored dubbing, make a few wraps over the head and thorax junction, whip finish, and apply a small amount of Zap-A-Gap under the dubbing with a dubbing needle.
At this point, a black or brown fine-tipped permanent marker comes in handy. You can make bars on the rubber legs, and small spots on the underside of the foam body to give it some superficial texture. I also dot the eye with a marker, although you can thread a small piece of monofilament through the head and melt the ends to give the eye more of a bulbous look. You can also shade the rear of the fly in orange or red marker for additional character.
The Grand Hopper encompasses the joy of modern synthetic materials with the age-old tradition of matching a natural insect that lives near the scenic rivers of southwestern Montana. Experiment with various colors of foam and rubber legs, and you might be surprised at what comes slashing from underneath a cool shady bank this summer.
Jeff Hostetler is a full-time instructor at Gallatin College. He spends his winters riding at Bridger and the rest of the year fly fishing southwest Montana.

