Cold Catch
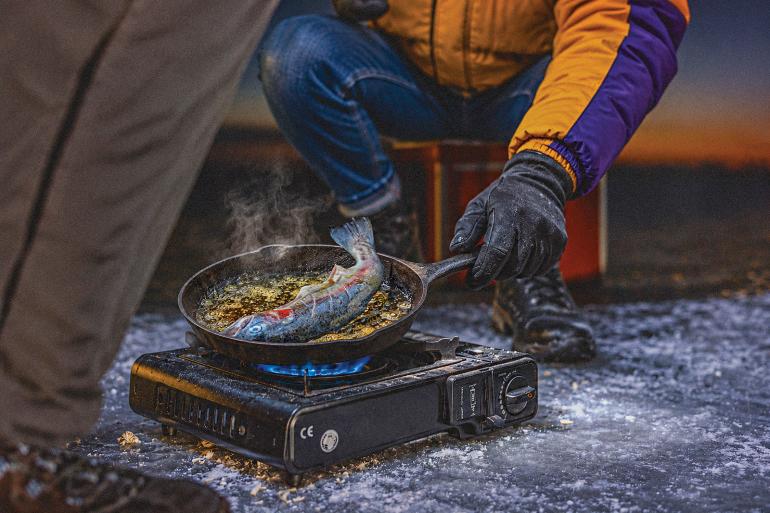
Cooking fish on the ice.
An ice-fishing catch-and-cook can be a daunting task. From the start, the quest one embarks on to catch a trout from beneath the surface of a frozen lake is slippery, cold, and sometimes infuriating. The elements present several obstacles designed to discourage anglers accustomed to the summer sun on the back of their necks and the sound of a flowing river. Chin up, intrepid angler! The quest can be completed if you dress right, store your fish properly, and avoid frozen beer.
First and foremost: you aren’t going to make it to the “cook” in “catch-and-cook” if you can’t move your fingers by the time you land a fish. Proper footwear and gloves matter most. Waterproof boots (preferably insulated) are essential, along with your best pair of wool socks—on really cold days, shove a handwarmer in the toebox. On your hands, wear thin glove liners before sliding on your warmest pair of hard-shell mittens. The shell is necessary to ward off cold wind and wet snow, and you’ll want the liners to offer some momentary protection and dexterity while you’re messing with your tackle and getting your cook station ready.
Next up are layers. The more, the better. Sitting in a folding chair and giving your worm jig an occasional bounce doesn’t require much range of motion in your arms or legs, so don’t be afraid to dress bulky. Cover your face and head with a balaclava and beanie, and you’re set.
Before you can catch dinner, you need to get your gear out there. A five-gallon bucket is a common carrier, but I suggest throwing everything in a cheap plastic sled to drag behind you. That way, you can load up your auger, pole, and tackle, and there will still be room for kitchen supplies, to include a Coleman camp stove or even a Blackstone.
Side note—your beer will freeze if you put it on the ice, so bring a koozie and hold it between your legs to give yourself a little more time to sip.
A minimum of two beers must be consumed during this process to ensure success.
When you’ve finally caught a fish, give it a good bonk on the top of the head, just behind the eyes. Throw it in a plastic bag and then into a bucket or cooler. In ice-fishing temperatures, direct contact with the ice can freeze your fish solid in no time, ruining the meat and your cooking process.
Okay, you’ve stayed relatively warm, contemplated your life while waiting for a bite, and stored your fish properly—now it’s time to eat. Some people get fancy with their fish, but in these conditions, it’s best to follow the KISS rule (Keep It Simple, Stupid). While cleaning your catch, keep rags and handwarmers nearby to dry your hands afterward. Break out your cooking device of choice and start heating a cast-iron skillet to your best guess of medium. Cast iron retains the most heat in frozen air.
Next, toss a couple pats of butter in the skillet. While it’s melting, pat the fish’s skin dry with a paper towel, then season with your favorite blend. I use a KISS concoction of salt, pepper, garlic powder, and lemon pepper. Place the fish in the skillet and give it a gentle press to ensure the cooking side gets full coverage of butter. Leave it alone for about four minutes, or until golden brown and crispy, and give it a flip. After a total of 8-10 minutes, you’re ready to eat! The meat should flake from the bones, and the crispy skin should help keep it together.
Don’t forget, you’re ice fishing, so a minimum of two beers must be consumed during this process to ensure success.