Clean Kill


How to properly field dress.
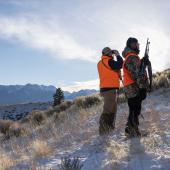
Much like the satisfaction of summiting a tall mountain, making a clean kill can give the deceptive feeling that your objective is complete. While both cases call for celebration, there’s plenty of work yet to be done—you’re only halfway there.
Once an animal hits the ground, the clock starts, and time is not on your side. The priority is to get the meat cool and clean, and in the hot days of archery season, this is no easy task. Whatever your scenario, be it bulls in September or whitetails in November, make sure to have a detailed dressing plan ahead of time so that a couple timely errors don’t result in spoiled meat.
There are a number of ways to field-dress game, but for now we’ll focus on one of the most popular: the good ol’ fashioned gut job. This process is something all hunters need to be familiar with. Once you have it mastered, then you can get into other methods like gutless quartering. For now, however, stick to these steps.
Tag the animal, then position it on its back, preferably on a slope with its hind legs downhill. Before opening the animal up, free the back end first. Cut around the anus in its entirety, so that the colon will release with the rest of the guts when you go to pull them out at the end.
Next, skin away the evidence of sex to a side of your choosing—note that this must remain attached to the animal until the entire butchering process is complete. One side of the pelvis bone should now be exposed. Feel the width of the pelvis and work your knife through muscle, down the opposite side, being careful not to cut the urethra and spill urine. Once the pelvis bone is completely revealed, sever the urethra near the top and get it out of the way.
Cutting under the hide but above muscle, make an incision from the top of the neck down to the pelvis. Be extra careful below the sternum to not puncture through the stomach lining into the organs. After you connect your incisions, you’re ready to break the abdominal wall. This is perhaps the most tedious part of the process. At the bottom of the sternum, delicately puncture the stomach with your knife. With your non-knife hand, push the guts down into the stomach cavity while simultaneously pulling up on the abdominal lining to create separation. Work your knife through the lining, toward the pelvis in upward slices. Depending on how bloated your kill is, this may be difficult as the innards could be bursting at the seams.
Now, time for the bone saw. With one hand on the guts to keep them out of the way, saw through both sides of the pelvis so you have a wide-open gateway. Then, go back up to the sternum and saw through the ribcage up to the neck, using your knife to cut away fat and muscle. When the animal is fully opened up, cut the windpipe as high as you can. The final step, before pulling everything out, is to free the organs from the diaphragm. Simply cut it with your knife. Then, using the windpipe as leverage, pull toward the bottom of the animal, cutting any attached diaphragm that’s left. With a couple slices and a few hard tugs, you’ll have an empty stomach cavity in no time.
Last but not least: drain the blood and keep the carcass open, to allow the meat to cool. Pry the severed ribcage apart and lock it open with a stick or other long, rigid object. Now you can haul your animal back to camp or the car—the last leg of your trip off the mountain.