DIY Bike Fit
Dialing in your mountain bike.
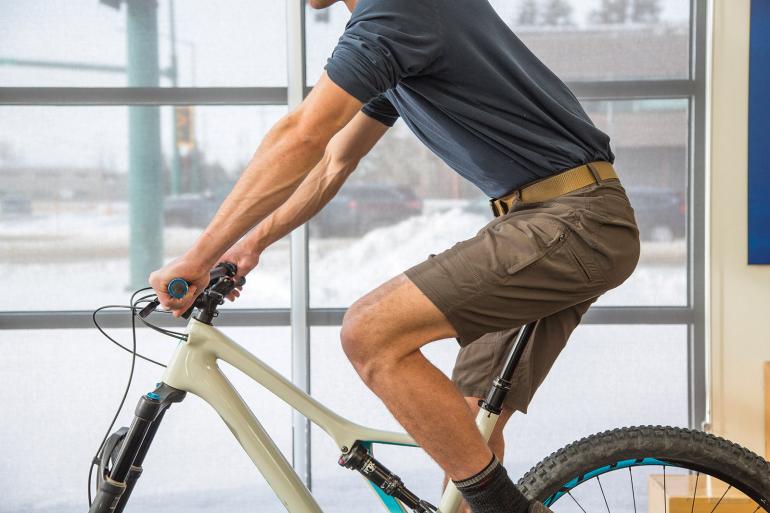
Bike-fitting is a unique blend of art and science. In-person fitting allows for a detailed discussion about training and injury history, investigation of riding styles and goals, and the opportunity for a musculoskeletal exam. The latter provides a foundation for the “science” side of the bike fit, while the other factors create the “art” aspect. However, professional bike-fitting can be pricey, and if it isn’t at the top of your to-do list, the following can serve as a basic “do-it-yourself” guide.
Preferred Equipment
Bike stand, phone with a camera and free app that can measure angles, and a biking partner who’s sick of hearing you complain about things that hurt.
Steps
1. Set the cleat position
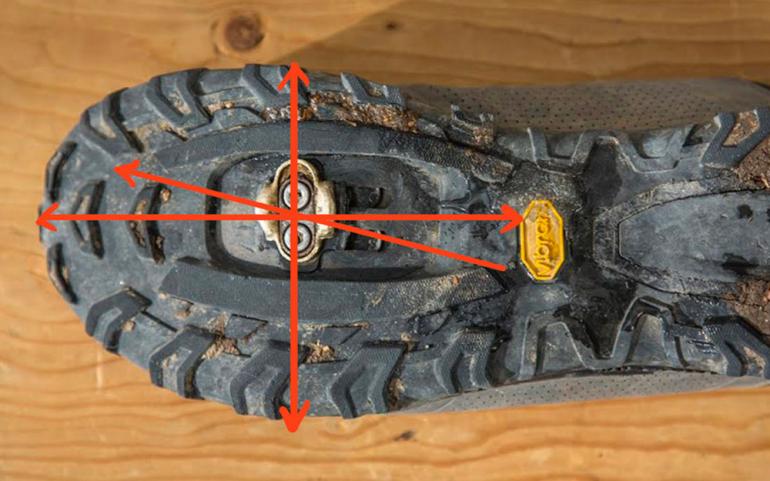
If riding “clipless,” establish the position of the cleat on the shoe. When doing this, there are three attributes to consider: front-back, rotation, and side-to-side.
- Front-back position: Typically, positioning the cleat as far back as the shoe allows is a good starting place.
- Rotation: A position that favors a slight toe-out position is a good starting point. This means that the cleat actually points slightly inward when looking at the bottom of the shoe.
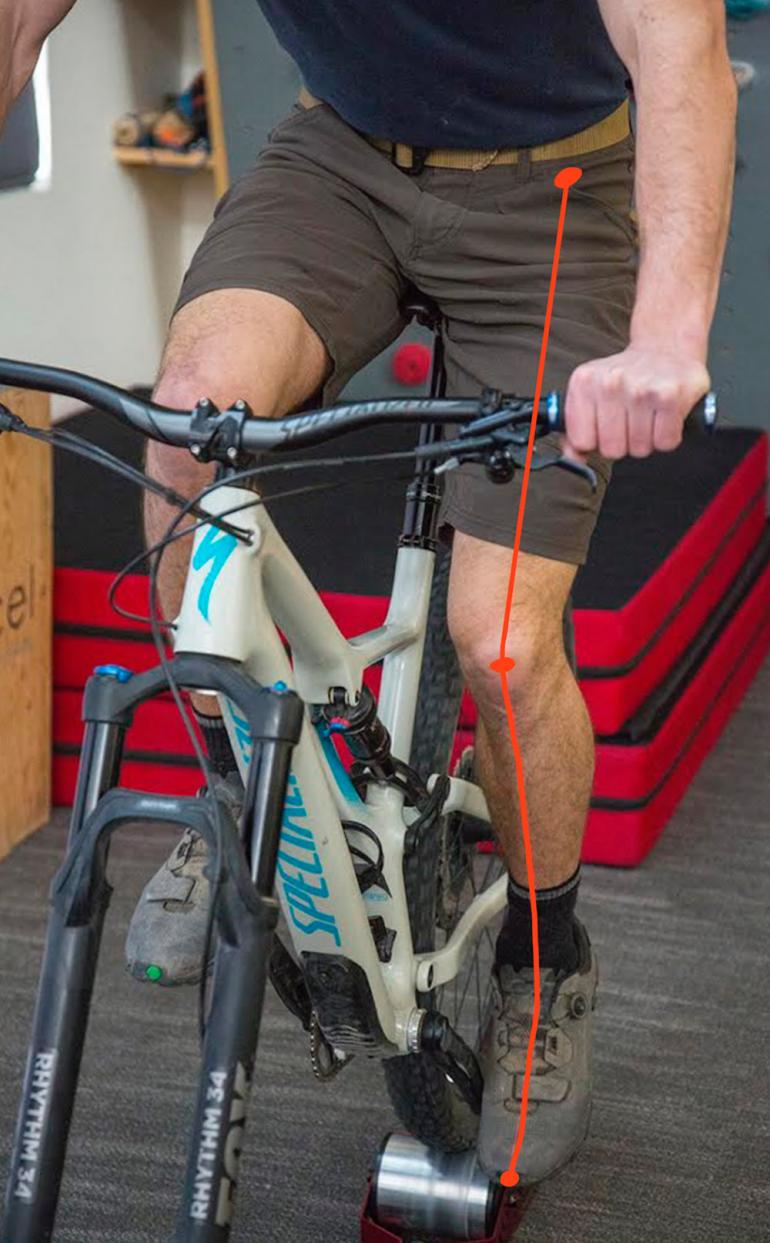
- Side-to-side: Start with the cleat as middle as you can get it, ideally at the bottom of the pedal-stroke. We’re looking for good alignment between the second toe, kneecap, and hip joint.
Arch height and foot alignment also contribute to how the foot interacts with the shoe, and thus how the leg moves through the pedal-stroke. Adjusting the footbed (possibly through the use of an orthotic) and potential shimming with a forefoot wedge can help improve alignment, and thus load tissues properly through a fluid pedal-stroke.
2. Set the saddle height
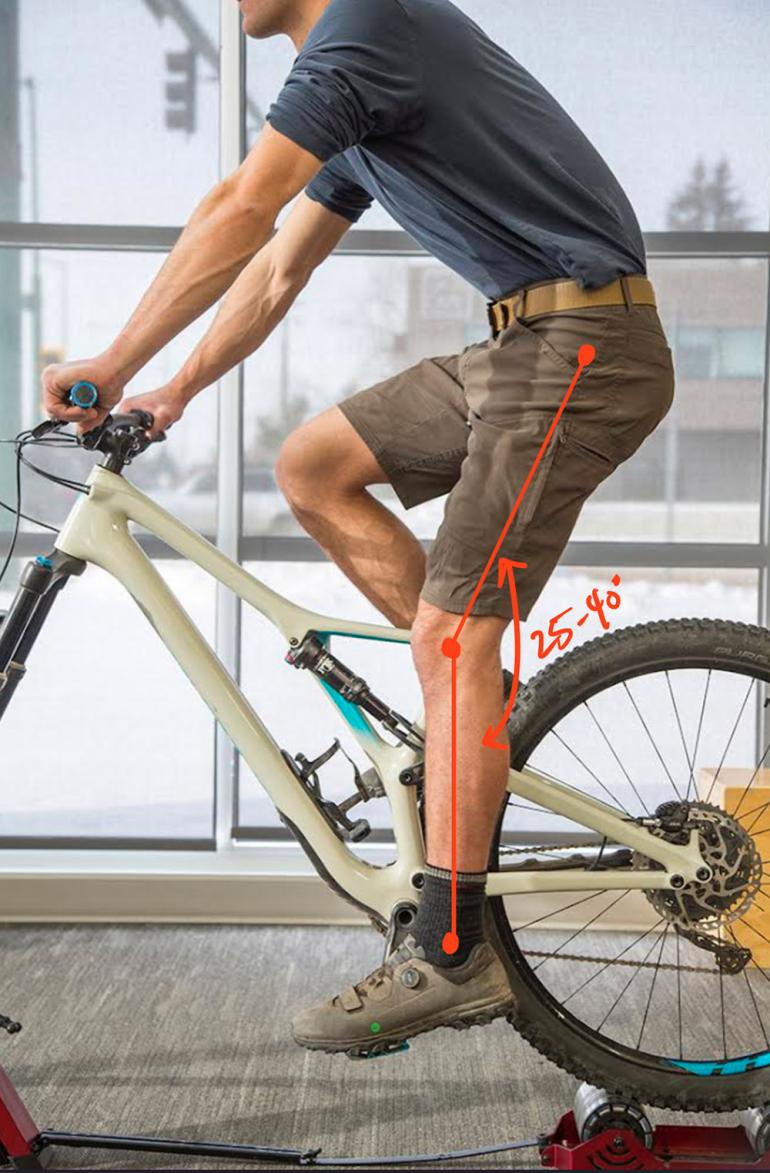
Measure when your crank arm is all the way down and perpendicular to the floor—basically the point at which your foot is the farthest away from the seat (be sure to maintain the same ankle position, and not drop or lift your heel). Look for 25-40 degrees of bend in the knee. Typically, in clinic, we are raising the seat height more than we are lowering.
3. Set the saddle fore/aft
This takes into consideration not only the lower back and hips, but also where the knee is, relative to the foot, when under load. From the side view, look for the front of the knee to be somewhere between right over the pedal spindle (furthest back recommended) to where the knee is over the big toe (but not in front of the shoe). After considering the knee, monitor what changes occur to the lower back (more on the lower back will be addressed in the next step).
4. Set the saddle angle
This will improve lower-back and hip position, which will help improve strain over these areas and allow for improved pedaling efficiency for short bursts of power and comfort on long days. While pedaling at a firm cadence and resistance, we like to see about 60% of the pressure on the saddle and 40% through the hands. From the side, we like to see a mountain-bike saddle tilted down from 2-4 degrees. On a gravel or road bike, 0-3 degrees is typically a good range.
5. Adjust the bar position horizontally (forward/backward)
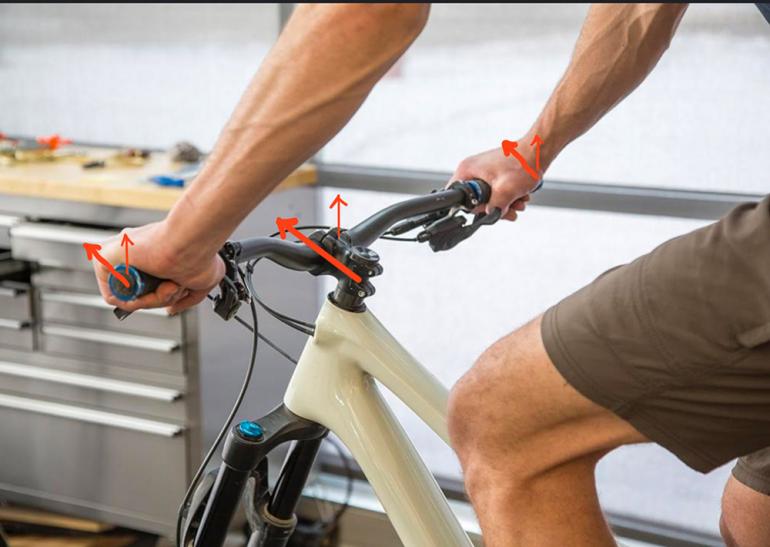
With this, we’re looking at the position of the shoulders and hands relative to the torso. Too short or too long of a reach will affect the lower back, neck, and pressure through the hands. Look for about 90 degrees or less in the shoulder-torso angle. Ideally not much more than that, but depending on body size and shape, it could be significantly less.
6. Set the bar position vertically (drop/rise)
Here, we take into consideration the height of the bars, which may be limited by the length of the steer tube or the number and size of spacers available. It’s important to remember that this step as well as the previous one will also impact reach, which affects the position of the lower back. There’s a delicate balance here (and everywhere else in the process) due to the nature of “circular causation.” This is something to keep in mind throughout the whole “fit” process. Ideal vertical position of the bars depends on what’s required for the optimal torso position and weight distribution, but it can be a good way to immediately address neck-pain complaints.
Common Complaints & Potential Solutions
1. Lower-back pain
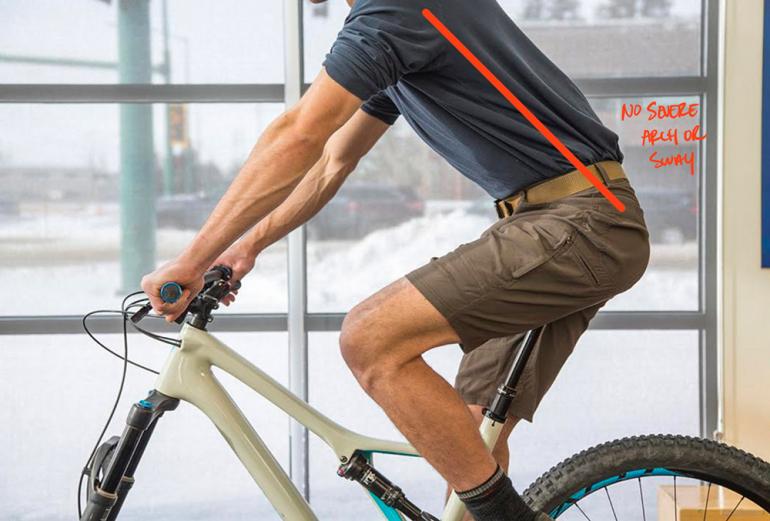
This complaint typically increases with longer-duration rides, or quickly increasing the intensity or frequency of riding. The main culprit for these complaints is typically the “reach”—specifically an over-extended position from the seat to the handlebars, which puts the lower back in an unfavorable position. It’s also important to consider the saddle position to improve the positioning and forces through the lumbar spine. Aim for a more “neutral” position (each person’s “neutral” is unique) by adjusting the fore-aft of the saddle, as well as the tilt. Look for a relatively flat or slightly rounded lower back without being excessively arched or rounded. Improving the strength and endurance of your posterior chain is also another huge component to dealing with lower-back pain.
2. Lateral knee pain
Pain on the outside of the knee region, known as IT Band Syndrome, can occur when cleats are too internally rotated. Consider adjusting them to favor a slight toe-out position. The saddle could also be positioned too far back or too high, and thus dropping the height and sliding the seat forward slightly could be a solution.
3. Neck pain
This typically occurs from over-extending the neck. Consider modifying the saddle position to limit how extended you are from the shoulders to the bars, and bringing the handle bars up to reduce the need for extending your neck to look down the trail.
Remember, small changes can make a big difference. My best advice is to make a few small tweaks and see how it feels, and then refine the process over the course of a few rides. If you’re struggling to find that desired position and feel or need help managing an on-or-off-the-bike complaint, feel free to reach out to us at Excel Physical Therapy.
AJ Sobrilsky is a doctor of physical therapy (DPT) at Excel PT. He’s a board-certified orthopedic specialist who works with mountain athletes. When not working, he’s biking, climbing, trail running, and skiing with his wife around the Gallatin Valley.
Excel is hosting a bike-fitting class on March 28th. Reserve a spot here.

