Pass the Dutchie
Cast-iron cooking over the campfire.
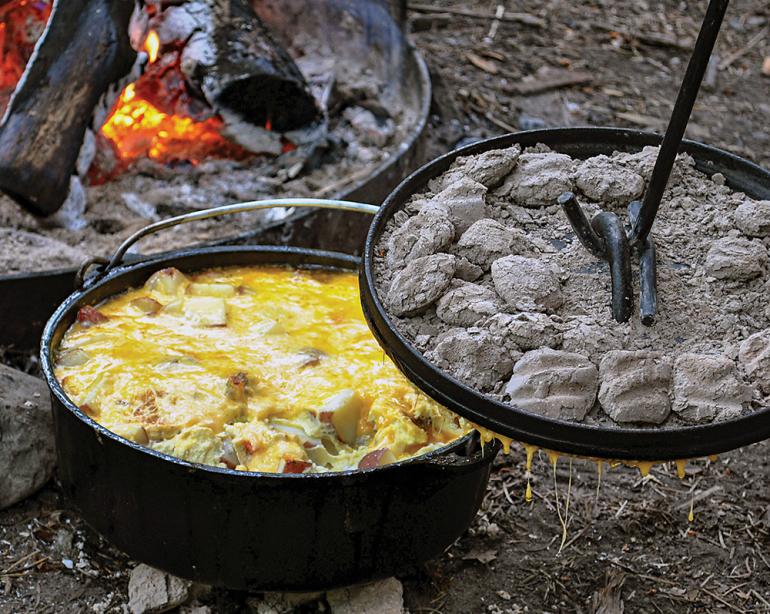
From the campfires of adventurous explorers across the Rockies to the great chuckwagon trails, cast-iron camp ovens have been an integral part of forging the American experience. Paul Revere, a blacksmith and silversmith by trade, is credited with the flanged lid of the modern Dutch oven. Said flanged lid, in combination with bottom legs, allow for a fire source to be under the pot and on the lid, making it an actual baking oven.
The possibilities are endless with a Dutch oven. And, it’s really easy to boot. Put a few coals on the bottom, put twice as many coals on top, and wah-lah—one can make or bake anything, anywhere. Legendary paella, bacon-wrapped scallops, pizza, bread, brownies, muffins, pineapple upside-down cake, breakfast frittatas… the list goes on. I’ve made all of this and more professionally—and personally—on Smith River trips and beyond. By stacking Dutch ovens, one can cook for larger groups, or cook dinner and dessert at the same time.
The first step is preparing a cooking area. Ideally, one uses a fire blanket on the ground, with a cooking table or platform, in an area protected from the wind. Being that we live in the arid west, it is imperative that one takes precaution to prevent any nearby foliage from catching fire.
The second step is starting charcoal briquettes, and the most efficient way to do so is by using a starter chimney. If you’re going to get serious about dutch-oven cooking, I highly recommend investing $20 in a Weber starter chimney or similar (available at Kenyon Noble). By loading newspaper or cardboard into the bottom of the chimney, one eliminates the need for lighter fluid and accelerates the production of consistently red-hot coals. I often just burn the bag that the charcoal comes in. I strongly discourage using match-light charcoal because it doesn’t burn as consistently and contains smelly chemicals that take a long time to burn off. One can, of course, use wood coals from the campfire as well. They don’t burn as long and are less predictable, so using wood coals can require more maintenance throughout the cooking process; however, they add great flavor and eliminate the need to carry charcoal which is an obvious advantage.
The number of coals depends on what one is cooking and the size of the oven. Typically it takes fewer coals than one imagines and a common mistake is to add too many coals—which leads to burning the bottom and/or top of one’s dish. A trick I use is to start a few more coals than I need, and keep them to the side. Then, if I need to crank up the heat during the baking process, I can add a couple coals. For a dish that takes more than 45 minutes to cook, one needs to add coals throughout the process. A charcoal chimney is invaluable for keeping a stash of hot coals at the ready, or for starting new ones.
Lodge Cast Iron has created a baking-temperature chart if one really wants to dial things in, but as a general rule of thumb just place twice as many coals on top as on bottom. An example from the Lodge chart for a 14-inch oven to obtain 350 degrees: ignite 32 briquettes and place 11 on the bottom and 21 on top. (Heat rises; therefore, more coals are needed on the lid to get an even amount of heat from above and below.) Keep in mind that this can vary with types of briquettes, wind, ambient temperature, and other factors.
Once the coals are hot, use metal tongs to place one-third of them in a random ring pattern and set the oven over the coals. Then place two-thirds of the hot coals on the lid. This is not a set-it-and-forget-it process; it’s a beverage-in-hand-tend-to-your-food process, which is part of what makes it fun. Although, I will say that with experience comes a more relaxed process. Remove the lid occasionally to ensure your food is not cooking too fast or slow. To prevent hot spots, rotate the oven and lid occasionally—especially if using stacked ovens. A metal lid-lifter or fire-retardant gloves are must-have accessories.
Simon Peterson is a riverside chef at Montana Angler.

