

Assembling an affordable outdoor rig.
These days, fully-loaded adventure trucks are everywhere in abundance. From jacked-up Gladiators to tricked-out Tacomas, a guy can't drive to the grocery store without spotting a half-dozen vehicles all set up for outdoor expeditions: cargo rack, rooftop tent, gas & water cans, recovery equipment, et al. Not to mention the suspension lift and fancy wheels. One can't help but wonder, how much did all that crap cost? And, if you're like me, the next inevitable question: where did a 23-year-old get all that dough?
Unfortunately, some of us do have to work for a living, and unlike the teeming trust-funders, we're on a budget—a tight one, at that. Which makes it hard to deck out a proper outdoor rig, for fishing, hunting, biking, skiing, climbing, and every other sport that awaits the intrepid Rocky Mountain explorer. But there is a solution, and a simple one at that: get creative and follow the path of least resistance.
Which is just what I did—and it's how I managed to build up a fully functional, perfectly practical, infinitely enjoyable adventure vehicle, for far less money. Here's the step-by-step.
Step One: Stock Options
Factory upgrades are about profit, not performance. Manufacturers package a bunch of mediocre components and superfluous features, pitching them with panache—and people eat it up. Fact is, most of it is fluff and frill, especially on an off-road vehicle. I mean, what am I really after in a truck—a flashy, luxurious driving experience, or a utilitarian workhorse that'll take me to cool places to hike, hunt, bike, and climb?
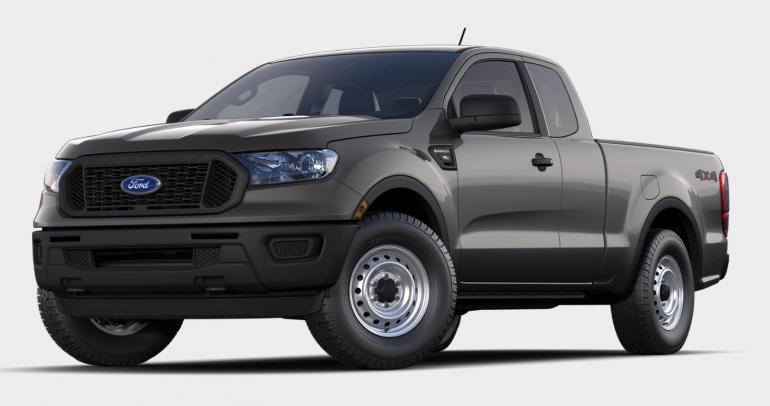
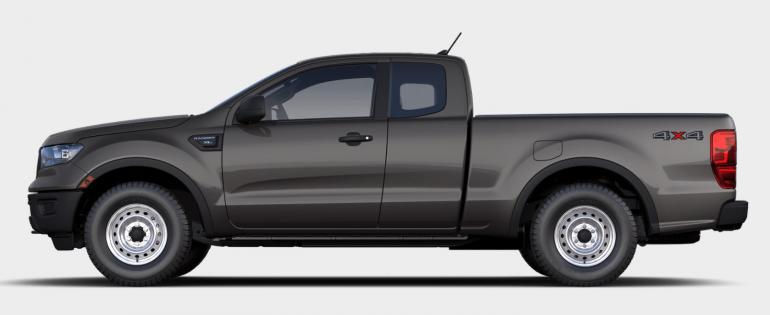
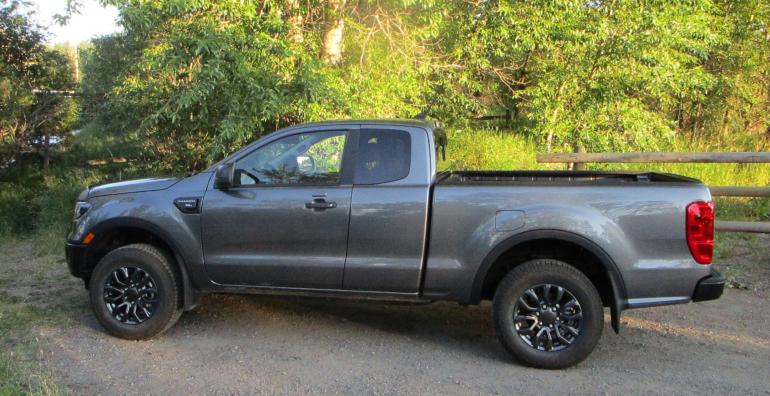
The latter, obviously—so I bought a bottom-of-the-line Ford Ranger 4WD, adding just a few a la carte upgrades: locking rear differential, mud flaps, sliding rear window, keyless entry. No off-road or tow packages. No fancy appearance and infotainment upgrades. Instead, I opted for a (much) smaller monthly payment and more cash in my pocket to add useful accoutrements for exploring back roads, running rivers, climbing mountains, and chasing game.
(The principle applies to all makes and models; I chose the Ranger because it was a few thousand cheaper than its competitors.)
Trust-fund option: Fully-loaded STX, FX4 Ranger Lariat: $44,600
Budget option: Stock Ranger XL: $31,500
Step Two: Getting Around
My stock truck came with small wheels and small street tires. So I went online and found a set of “takeoffs”—perfectly functional rims and tires from higher-level Ranger models, that the tricked-out trucksters remove in order to install the latest, coolest brands. I don't care about being hip, I just want what works—and the Ford wheels and basic Dynapro off-road rubber work just fine, at least for my first season or two, getting to know my truck and saving money for more important accessories, like gear-hauling implements and front-end protection.
Equally unnecessary is a new suspension and four-inch lift kit. My old boss used to drive his two-wheel-drive Chevy S-10 on boulder-strewn mining roads, past the point where lifted Jeeps had turned around—
"Take your time," he'd say, "and learn how to drive." I'm not planning on rock-crawling in Moab, so standard 4WD clearance, larger wheels and tires, and solid driving skills will get me by just fine—again, at least for the first couple years.
Not quite off-road ready
Trust-fund option: New suspension, Method/Fuel rims, top-of-the-line tires: $5,000
Budget option: Ford take-offs (wheels & tires): $650
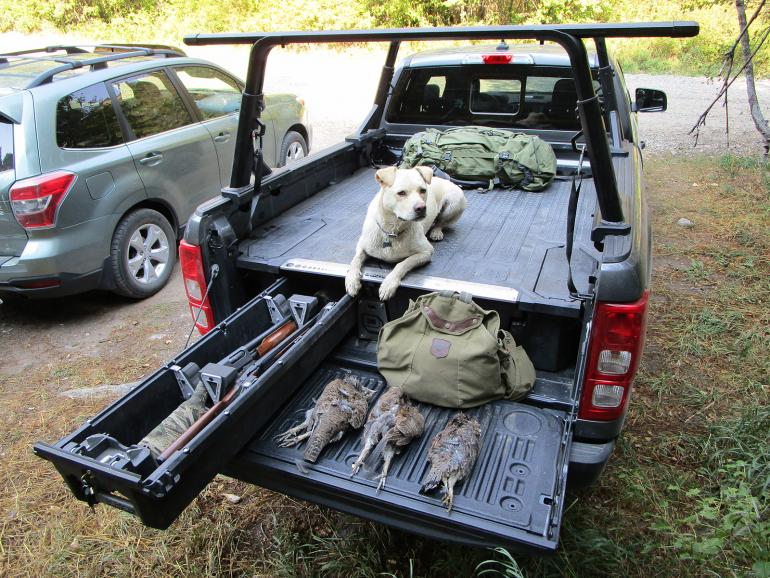
Step Three: Storage Drawers
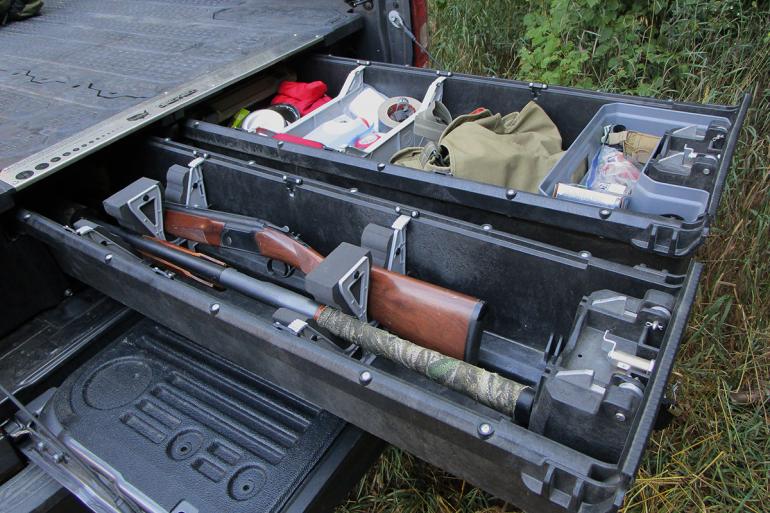
Organization is paramount, especially for hauling game and equipment. So is security, for expensive gear and guns. Lots of options exist for truck drawers, but the DECKED system gave me everything I needed without the incomprehensibly enormous price tag. The drawers slide smoothly on large wheels, and the platform can handle whatever load I put on it. It's also waterproof, and the drawers come with dividers, a toolbox, and a removable tub. Other accessories are available for even more convenience and customization.
I installed these drawers myself in an afternoon, and have found them to be extremely well-built and durable. Odds are, they'll last as long as the truck itself. Sure, I could've built my own, but they'd be weaker, less secure, and perform poorly in comparison. And with the price of lumber these days, I'm not sure how much money I'd actually save. This one might classify as a splurge, but given the reasonable price compared to other brands, not much of one.

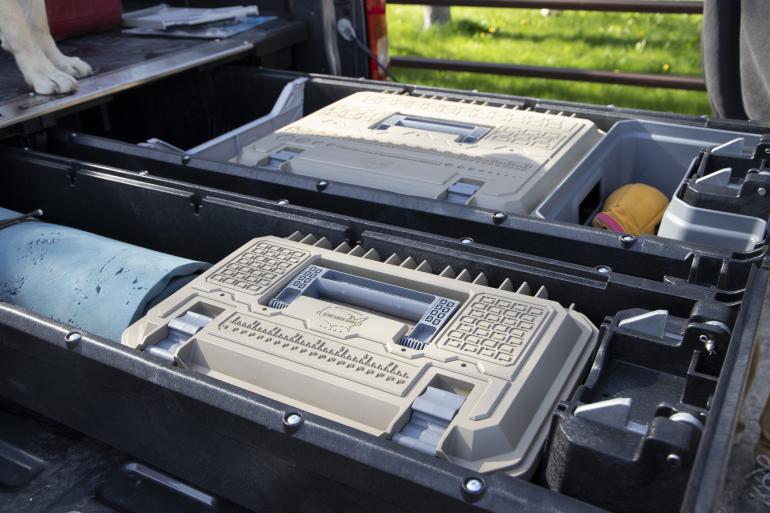
"D-boxes" keep like items together for quick removal

The "drawerganizer" comes out for easy hauling

"Ammo cans" offer extra storage behind the wheel wells
Trust-fund option: TruckVault: $5,000
Budget option: Decked: $1,450
Step Four: Load Hauling
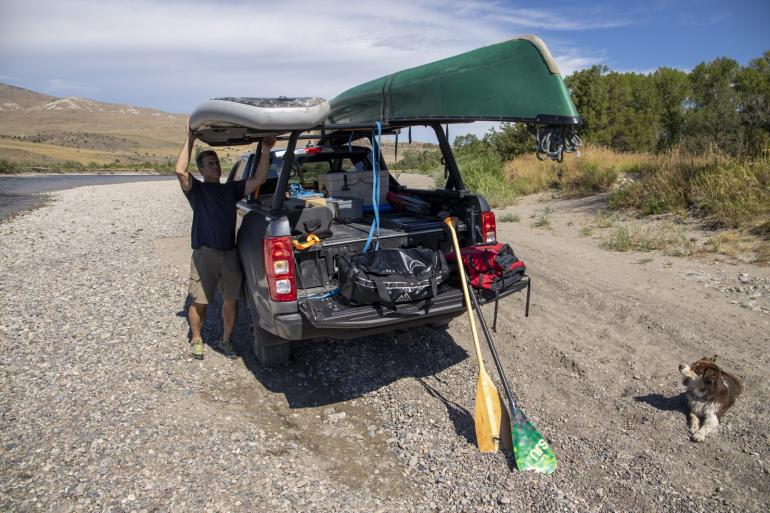
For comfortable camping, a topper is hard to beat. Throw on roof racks and you can haul a canoe, kayak, or paddleboard with ease. What isn't hard to beat is the price: a good camper shell is upwards of three grand. But cargo racks abound—with the popularity of rooftop tents, these once-rare load-hauling items have become commonplace, with numerous manufacturers and styles available.
Despite a slew of cheaper options, I chose the Yakima OverHaul HD, mainly for its versatility. This rack is adjustable, allows for optional side rails, and is compatible with a wide range of accessories—everything from bike mounts to a rocket box. Another splurge? You bet. But I want something that's made to last, and this sucker is solid, able to bear 300 pounds during off-road driving. Throw a few T-bolts into the integrated slots, and you can secure just about anything.
For protection from the elements, I built a roof rack out of scrap wood and a few U-clamps from the hardware store. It also serves as a platform to keep rain and snow off. When it blows sideways, I slip a tarp over the top and voila, I'm dry as a bone.
Together, the OverHaul and homemade platform aren't as warm and wind-free as the topper, but they're way more versatile. The roof rack holds my canoe and other gear, leaving the bed open for sleeping. And, unlike the small topper windows, the OverHaul leaves the sides open, so I can reach in to grab large items quickly. No more clambering in from the rear every time I need something.

Professional metalwork + garage woodwork

Note the drain hose, left rear corner

The burly steel posts hold extremely heavy loads

The 68" crossbars will hold two watercraft side by side

End-cap tiedown points make lashing quick and easy
Trust-fund option: Topper: $3,500
Budget option: Yakima OverHaul HD: $1,150 | Homemade Roof Rack: $100
Step Five: Front-End Protection
For protection from inadvertent collisions with brush and deer—not to mention illegal gates blocking access to public land—a guy's gotta beef up his front end. Burly bull bars are great, but they're also spendy. With constant vigilance, moderate speed, and quick reactions, a grille guard should do the trick, for a lot less money. And you can install it yourself, with basic tools, in the driveway—not so with a full-on bumper replacement.
After researching all the options, I went with a Westin Sportsman. The solid, one-piece construction, double hood-bar, and wrap-around headlight protectors give me peace of mind, while multiple mounts allow for future installation of fog lights, which are equally important tools to prevent sudden cervine smack-downs. It won't absorb a high-speed wallop with a wapiti, but for frontal impacts with deer, no visit to the body shop should be necessary.


Trust-fund option: ARB bumper: $2,000
Budget option: Westin Sportsman Grille Guard: $850
Step Six: Final Touches
With the big stuff out of the way, I turned my attention to the smaller details: minor enhancements to make the rig more useful and convenient.
An E-Trailer tow hitch saved me $300 over the factory Ford option. Cordura seat covers from Marathon cost $500—a hard pill to swallow, but they'll protect my cheap fabric seats for years to come, and I can run them through the washer when they get dirty. Cargo hooks ($20) and straps ($20) from eBay improve load-carry, while Piece Keepers ($75) and drawer locks ($50) from DECKED enhance organization and security in my storage drawers. Last but not least is another splurge: a durable waterproof duffel bag from SealLine ($250), which holds my clothes and other gear that needs to stay dry—once it's zipped up and strapped to the OverHaul hooks, I'm worry-free; the bag can withstand a deluge.
"Piece-keepers" hold guns safe and secure

Handy hooks for securing loose gear

Aftermarket clips above the drawers for securing cargo

Cargo straps and carabiners keep gear from falling out
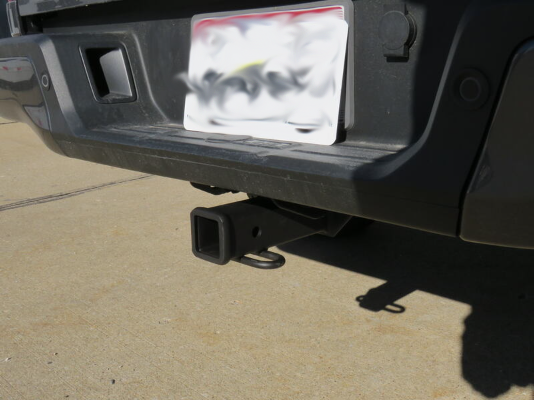
Aftermarket tow hitch, a third of the factory price
Step Seven: Enjoy the Ride
There you have it: a fully-outfitted recreational rig, and a huge pile of cash saved—not to mention the pride of ownership that comes when you build something yourself. Total expenditure: $36,775. That's almost half the cost of the alternatives listed above, which weigh in at a whopping $60,725. So when you're ready for your next vehicle, consider the options I've lined out here, and put that extra 24 grand in the bank—or spend it on gas during epic road-trips in your trusty, affordable adventure rig.


By the Numbers
Ford Ranger XL 4WD: $31,500
Ford Factory Rims & Tires: $650
DECKED Truck Drawers: $1,450
DECKED Piece Keepers: $75
DECKED Drawer Locks: $50
Yakima OverHaul HD Bed Rack: $1,150
Westin Sportsman Grille Guard: $850
Homemade Roof Rack: $100
E-Trailer Tow Hitch: $160
Marathon Seat Covers: $500
Cargo Hooks: $20
Cargo Straps: $20
SealLine Waterproof Duffel: $250
Total: $36,775