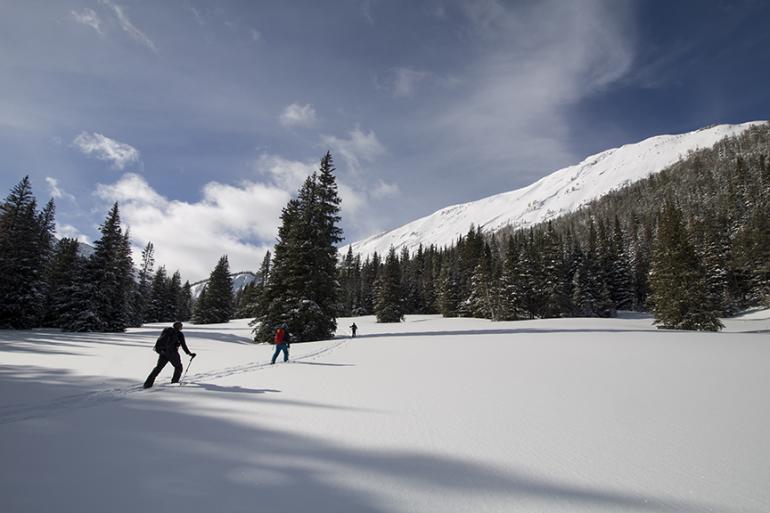
Braving the Backcountry
A beginner's guide.
I became hooked on backcountry skiing as an intern with Gallatin National Forest Avalanche Center back in 1995. Since then, I have only ridden the lifts a handful of times each season.
While skiing in the backcountry, I tune in to the weather, terrain, and snowpack in a way that allows me to appreciate the mountains and my companions much more than when I ride the lifts. It may take a few hours to get back to that powder stash just to make a few runs, but spending all of that time in the backcountry connects me to the winter environment much the same way that hiking in grizzly country forces me to be more observant, respectful, and appreciative of my surroundings. Not to mention the freedom from ski-resort crowds and sharing the day with a few great ski companions.
Sound appealing? Then it might be time to start your own backcountry apprenticeship. Sure, you can just slap skins on your skis and head into the hills as many folks do. But if you take time to figure out what you really want from the experience, you're more likely to choose gear that will give you that experience. So here's a rundown of the latest and greatest in backcountry-ski technology.
Telemark Skiing
Formerly preferred by the wool-knickers-and-Norwegian-sweater crowd, telemark gear is distinguished by a free-heel cable binding, but the rest of the gear has evolved to resemble the alpine gear you see at the resorts. Big plastic boots drive fat skis down lines that were reserved for the most advanced alpine skiers just a few years back, and the new gear is nearly as heavy as alpine gear. There's nothing like the feeling of cold powder flowing over a bent knee, but the weight and resistance from today's gear have taken some of the fun out of it.
Thankfully, gear manufacturers heard the uproar and developed free-pivoting telemark bindings that virtually eliminate touring resistance. The G3 Ascent ($270) and Black Diamond 01 ($300) were the first bindings to offer a pivoting toe that also locks, giving you the added control of the spring-loaded cables. This year, the folks at Rottefella have teamed up with Scarpa to develop a new boot/binding interface called the NTN (aka New Telemark Norm, $350). This radical new concept eliminates the duckbill toe on tele boots by attaching under the ball of the foot with the proprietary NTN binding mechanism. Initial feedback is positive, but Garmont & Black Diamond are entering the fray and developing new boot/binding systems of their own.
Alpine Touring (AT)
This setup utilizes bindings that have a free-pivoting toe piece for approaching your favorite slope. Once at the top and ready to ski down, your heel locks in place. You then make parallel turns just as you would with regular alpine gear.
As a bonus, AT bindings are designed to release in a fall (see sidebar), reducing the potential for injury. If you’re caught in an avalanche and the skis do not release, emerging unscathed would make winning the lottery actually seem feasible. Not only do you have the avalanche to worry about, you have your still-attached skis acting as giant levers against your bones and joints. They also act as anchors that pull you deeper into the snow.
The popular Fritschi FreeRide ($425) offers a DIN of 12 (see sidebar) and is THE go-to crossover binding for resort and backcountry skiing. Step-in ease, multiple climbing-height positions, and good durability place this high on the list for folks looking for a single resort/backcountry setup. Another solid performer is the Naxo nx21 ($400) with a DIN of 13. It offers a dual-pivoting toe piece that helps maintain a natural stride when skinning uphill.
For dedicated backcountry skiers, a lightweight kit featuring the DynaFit binding system (starting at $350) is a proven winner and my hands-down favorite. A design marvel, these bindings are less than half the weight of traditional AT bindings. Utilizing four tiny points of contact with your boot, they offer DIN releasability, effortless trail breaking, and a solid boot-to-ski connection. Don’t be fooled by the svelte appearance; I know folks who weigh 250 and they ski this binding hard. If you like catching air, this is not your binding. If you prefer touring for your turns and lapping that slope into a canvas of perfect squiggles—do not hesitate.
A new offering called Duke from Marker ($430) provides the ultimate control for an AT binding and carries a whopping DIN of 16. This binding is perfect for a new wave of skiing called “sidecountry.” With open boundaries at many ski areas, it is possible to leave the ski area, hike or skin to a nearby powder stash, then traverse back into the ski area. For the sidecountry the Duke is going to kill it. However, at 3 pounds per binding you will not see many of these shuffling past you.
Reaping the Rewards
Whether you prefer hard-charging, full-combat, lock-down AT gear or lean more toward the free-heel state of mind, take an avalanche safety class before you take your first backcountry tour so you know what you’re getting you and your partners into. And no matter your gear preference, the most import thing to embrace when backcountry skiing is that skiing uphill is still skiing. Granted, breaking trail in knee-deep snow for five or six hours is about as fun as a root canal; but like most things, the bigger the challenge, the sweeter the reward. After you strip off your climbing skins and take those first blissful turns through a pristine powder field, you’ll forget all about the skin up and remember exactly why you live in Montana.
Jay Pape has worked in the ski/outdoor industry since the late eighties, and is currently the education coordinator and treasurer for the Friends of the Gallatin National Forest Avalanche Center. His favorite skiing experience was skating on 5,000 feet of perfect corduroy 600 miles from the South Pole.
DIN Settings and AT Boots
The German Institute of International Standards sets a standard (called a Deutsche Industrie Norm, or DIN) that measures a ski binding's ability to release. The measurement is based on a formula that considers the skier’s height, weight, ability, and boot-sole length in order to calculate the amount of torque required to release a binding. This standard is recognized around the world for step-in alpine bindings and modern Alpine Touring (AT) bindings.
DIN ratings range from less than one to 24. So, how does that affect your backcountry setup? Well, it means that you can use your trusty alpine boots in AT bindings such as those by Fritschi, Naxo, and Silvretta. However, you should not attempt to run your new rubber-sole AT boots in your alpine setup.
Why? AT boots have a rubber sole that is more secure for hiking and climbing. However, rubber soles introduce more friction to the binding-release mechanism, altering the DIN. Does that mean your normal DIN of 8 is now a 14? Not necessarily, but there is no doubt that the setting can change. The rubber soles can expand and contract and introduce more (or less) friction to the binding-release mechanism. The result could be the dreaded high-speed prerelease, or the even-worse non-release, which can be a season-ending episode.
Can you run AT boots in your alpine bindings? Yes. Is it worth a new ACL to you? Your call.
-Jay Pape
The Beta on Skins
For serious backcountry skiing you’ll need a good pair of climbing skins, which you’ll have to cut to fit your skis. There are two schools of thought here: Edge-to-edge (aka the “wall-to-wall carpet” method) or trimming your skins and leaving the edges exposed. I prefer wall-to-wall carpet and here’s why.
If you run exposed edges on skis with a modern sidecut, it’s critical that you keep the ski totally flat while skinning. If not, you risk being slightly on edge due to the inherent shape of the ski. This will send your ski slipping backward when you climb. With wall-to-wall carpet, you always have the skin in contact with the track. If you are relying on your edges when ascending or side hilling, you should consider rerouting your skin track or booting through that final icy section.
Not convinced? Start the season by trimming your new skins wall-to-wall. If you’re not happy with that, you can always retrim to expose the edges. It's easier to take away than to add: if you start out by exposing the edges and don’t like it, you'll need to buy a whole new pair and start all over again.
-Jay Pape


