Soulless Dancin' Sculpin
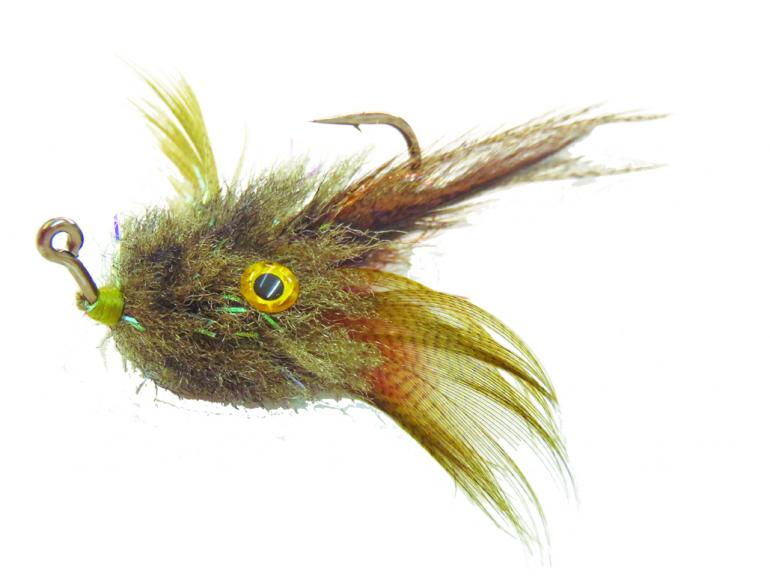
When I think of fishing in the fall, I think of one thing: streamers. There’s something almost romantic to a streamer addict about fall, with the leaves turning colors and fish getting aggressive as the brown trout begin their courtship. That’s why this particular sculpin pattern is perfect for throwing on heavy sink tips, as it has a lot of action with the feathers and body fur head that pushes water. Using synthetic materials for the head allows the fly to shed water on casts and keeps the overall heaviness of the fly to a minimum (good, considering you’re whipping it around your head and your arm has been casting streamers all day). I’ve fished this pattern with success on the Madison and Yellowstone, where the larger trout appreciate its relatively large size.
Materials
Hook: Gamakatsu Jig 60-degree round bend 3/0, 2/0
Body: UV Polar Chenille, olive copper UV
Thread: Danville Flymaster Plus, olive
Weight: Medium or large channel lead
Tail: Coq De Leon, dark or medium pardo
Throat: Marabou red
Pectoral Fins: Mallard flank
Head: CCT Magnum body fur, olive
Eyes: 3-D molded eyes, 3.5
Instructions
1. Load the channel lead to the top front half of the hook and secure with thread. You only need 1/2- to 3/4-inch of it to add weight and keep the hook riding point-up.
2. Tie in your UV Polar Chenille right at the halfway point on the hook shank; wrap 3-5 turns forward and tie off.
3. Select four Coq de Leon feathers that are roughly the same length and thickness for your tail, and tie two feathers married together on both sides of the hook extending back.
4. Tie in the red marabou on the top side of the hook. One plume should be plenty, and you want this extending just to the hook bend.
5. Add your pectoral fins—the mallard flank. Tie it in so the feather curves out and away from the hook for the most dramatic-looking pec fins.
6. Tie in the body fur for the head on the sculpin. Be sure not to leave a large gap between your pectoral fins and the head area.
7. Wrap the body fur forward, making one wrap next to the other as closely and tightly as you can—this will allow for a more uniform head when you trim the materials. After wrapping the material, tie it off and brush it out with a toothbrush or dubbing brush.
8. Trim the head to shape. You are looking for a fat half-circle with the bottom trimmed rather flat—this will also aid in the movement of the fly in the water.
9. Add eyes to the top of the head. I prefer to use Zap Gel, but any gel-based adhesive will do the trick.
Kris Kumlien is the general manager at Montana Troutfitters in Bozeman on his better days.